
Teams Meetings to be removed
Guidance and videos about how to organise meetings or conferences using Microsoft Teams.
Getting Started with Teams meetings
Meetings in Teams have audio and video capabilities, and allow for face to face meetings at any time with up to 300 attendees. You can share your screen, files, meeting notes and chat with meeting participants during the meeting.
What if I need a larger meeting?
If you need to host a "town-hall" style event in Teams you should use Teams Live Events. Live Events allow the University up to 15 concurrent broadcast events with audience sizes of up to 10,000 people.
For further information on Live Events and how to book one, please see out Live Events page:
Can I get more detailed help with meetings?
For detailed training on Teams meetings have a look at the Private Chats and Meetings section of the LinkedIn Learning course (requires you to sign in with your University log-in details):
Microsoft Teams Essential Training
Microsoft also provide an overview of meetings in Teams in a series of short videos:
You can schedule your meetings either through Teams or through Outlook.
Schedule your meeting in Teams
Teams Tip: You need to schedule the meeting within Teams if you want a meeting to be in a Channel.
- Select the Calendar icon from the navigation bar
- Then, click "New meeting"
- Then, add the details of your meeting
- Next, if you want the meeting to be in a Channel, type your Team name in the "Add channel" box, then click the Channel (this is optional)
- Then, click "Send"
- The meeting will now show in your calendar in Teams and Outlook, and a meeting invite will be sent to attendees with a meeting Join link.
Teams Tip: Remember to set your meeting to Private in Outlook to make your Teams meeting as secure as possible.
How to schedule your meeting in Outlook
Outlook Desktop app (Windows)
-
Open the Outlook app and switch to calendar
- Then, click "New Teams Meeting"
- Next, add the details of your meeting and click send
- The calendar event will now contain a Join Teams meeting link that you and all participants can click to join the meeting
Outlook Desktop app (Mac)
-
Open the Outlook app and switch to calendar
-
Then, click "Meeting"
-
Next, click "Teams meeting" from the top bar
-
Next, add the details of your meeting and click send
-
The calendar event will now contain a Join Teams meeting link that you and all participants can click to join the meeting
Outlook on a Web Browser
- Open outlook.com/ed.ac.uk and switch to calendar
- Then, click "New event"
- Then, click "Add online meeting" (to the right of the "Search for a room or location" box) and select "Teams meeting"
- Next, add the details of your meeting and click send
- The calendar event will now contain a Join Teams meeting link that you and all participants can click to join the meeting
For in-depth guidance on scheduling meetings, please have a look at the LinkedIn Learning video on this topic (requires you to sign in with your University log-in details):
Schedule a meeting and invite attendees
Changing meeting lobby settings
If you are the meeting organiser you can change who has to wait in the meeting lobby before your meeting. By default all guest users (anyone without an ed.ac.uk email address) has to wait in the lobby before your meetings, however you can change this so that everyone has to wait in the lobby except you, the meeting organiser.
To do this schedule your meeting, then access the Meeting Options.
Step-by-step guidance on changing your meeting lobby settings is available in the following link:
Live Events in Teams allow for large scale "town hall" events supporting up to 10,000 audience members. Events will run up to a maximum of 4 hours and are limited to 15 simultaneous events across campus. The format is typically multiple presenters taking turns to give a presentation and audience Q&A.
You can request to host a Live Event by filling out the request form on our Live Events page.
How to use the "Meet Now" feature
For impromptu ad-hoc meetings, you can use the " Meet Now" feature of Teams.
How to use the meet now feature in both the Calendar and Channel features of Teams
You can also now get a quick link to your meet now meeting to share with users that you want to join your meeting.
To get this link:
- In the Teams calendar, click the "Meet now" button in the upper right of the window
- Click "Get a link to share" and your link will be copied to share with others
- Click start meeting
Teams Tip: You don't need to create a new chat group or Team channel to connect with people using Teams, use the "Meet now" feature or schedule a meeting using your calendar.
For further guidance, see the LinkedIn Learning video about on demand meetings (requires you to sign in with your University log-in details):
Meet now button in Outlook
Note - this feature is only available on Windows devices.
If you are using a windows device and have both the teams and outlook desktop apps installed, you will have a meet now button in on the ribbon of the calendar in Outlook. You can use this button to start an ad-hoc meeting in Teams.
Joining by a meeting invite
The person who set up the Teams meeting can invite you via a meeting invite in Outlook. This invite will include a link to allow you to join the meeting online. When your meeting is due to begin click this link.
Joining from your calendar in Teams
All meetings you are invited to will appear in your Calendar in Teams.
To join a meeting, click the Calendar icon in Teams, click the meeting, and then click "Join" in the top right of the Teams window
Joining from your Teams Channel
If a meeting has been set up in a Teams Channel that you are a member of, you can join the meeting from that Channel.
Navigate to the post in which the meeting was created and click the "Join" button.
Joining from your Chat space
You can also join meetings from your chat space if the meeting has begun. Click the meeting in your recent Chat list and then click the "Join" button in the top right of the Teams window.
After you've joined your meeting
After you've joined your meeting, your meeting will open as a separate window. This allows you to easily continue working on other things in Teams during the meeting and to more easily share your Teams screen.
Differences between Teams desktop and Teams web
Currently, in Teams on the web, you can only see one meeting participant's video feed at a time. An update is being rolled out now for the Chrome and Edge browsers, meaning you will be able to see 4 participant's video feeds at a time.
If you want to see more participant's video feeds, use the Teams desktop client.
New Pre-Join Menu
Microsoft are currently rolling out a new pre-join menu for Teams meetings. Only certain users at the University will see this feature at the moment but it will be coming for everyone very soon.
The new pre-join menu looks like the image below:
- Background image options is also in the same place under your video feed or profile picture
- The turn on/off video toggle is in the same place under your video feed or profile picture
- The Internal Mic and Speaker options and the option to mute your speaker before joining are under the "Computer audio" section to the right of your video feed or profile picture
- You can also select to use phone, room or no audio in the meeting
- The Join button is now "Join now" and is to the bottom right of the pre-join menu
If a user who does not have a University of Edinburgh account receives an Outlook invitation to a Teams meeting, they can still join as an anonymous user. There is no need to add the user as a guest.
Joining a Teams meeting as an anonymous user
User joining with the Teams desktop app installed
- Log out of your existing Teams account (if you have one) in the desktop app by clicking your profile picture and selecting "Sign out"
- Then, click the "Join Microsoft Teams meeting" link from your meeting invite email
- Then, a webpage will open, click "Launch it now" below the two other options on the webpage.
User joining via Web Browser
If the anonymous user will be sharing their screen during the meeting, make sure they join using the Google Chrome web browser.
- Log out of your existing Teams account (if you have one) in your web browser by clicking your profile picture and selecting "Sign out"
- Then, click the "Join Microsoft Teams meeting" link from your meeting invite email and a new page will appear
- Next, click the "Join on the web instead" button
- Your browser will open the meeting in Teams. Your browser may also ask if it's ok for Teams to use your microphone and camera, allow this so that the other meeting attendees can see and hear you.
- Then, type your name in the "Enter name" box
- Click "Join now"
User joining with the Microsoft Teams mobile app
- Log out of your existing Teams account (if you have one) in the mobile app by clicking your profile picture, selecting "Settings" then "Sign out"
- Click the "Join Microsoft Teams meeting" link from your meeting invite email on your mobile
- Then, the Microsoft Teams mobile app will open automatically
- Next, click "Join as a guest"
- Then, type your name in the "Name" box
- Click "Join Meeting"
Further help
Microsoft have guidance on how to join Microsoft Teams meetings as an anonymous user:
Join a meeting without a Teams account guidance
Audio Conferencing Meetings
Important - You do not need to request an audio conference license to join a meeting in Teams by phone. You should let the meeting organiser know if you will need this option.
This service is for audio conference meeting organisers only and there will be additional costs to use this service.
A conference meeting orgnaniser may be someone who manages large project meetings, schedules many large meetings on behalf of someone else or meets with the public, including external suppliers and needs to host an audio conference meeting.
Note - Your careful consideration is required before choosing a dial-in option for your meetings.
- This option simply allows an 020 toll number added to your meeting invites for users to dial-in from a telephone landline which is not the best participant experience.
- We can facilitate the purchase of audio conference licenses but we cannot guarantee the quality of the calling service for your meetings.
- Most users will likely have a smartphone, device and wifi connection that lets them use the Teams app which is highly accessible and likely no extra cost to them for calling your meeting.
- Before your meeting, check with your attendees if they can access and use the Teams app. You can provide them with the following guidance:
How to join a meeting using Teams
- Users who need to dial-in to meetings will incur charges to their phone bill. This is covered in the terms of use which will be issued to you if you choose the option.
- If you only need a dial-in option for some meetings, release the number again.
- It can typically take up to 1 week to process a request for the audio conference option because this requires purchasing licenses and assignment to your meeting hosts once authorised.
Cases where a dial-in option might be more convenient for some people:
- Where internet connectivity, home kit devices are limited and there's no other alternative
- For audio only meetings, although the Teams app supports audio only
- When hands-free with a Bluetooth device is required
Request an Audio Conferencing License
How to dial-in to a meeting
- Dial the telephone number at the bottom of your meeting invite
- Enter the conference ID at the bottom of your meeting invite
- State your name (if prompted)
You can add a custom background (or blur your background) to your video feed in a Teams meetings.
To add a custom background, select a pre-added background or blur your background, see the following instructions from Microsoft.
Change you background on desktop or browser
Change your background on mobile
There are University of Edinburgh branded custom backgrounds available for you to use in your Teams meetings. You can download the images from the link below:
University of Edinburgh branded backgrounds for Teams meetings
Features in Teams meetings
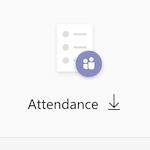
You can access this report by double clicking the meeting in the Teams calendar and clicking the "Attendance" button under the "Details" tab.
This report will be downloaded as a .csv file and will show the names of the attndees, their join and leave times, the duration they attended the meeting, their email and their role in the meeting.
What are breakout rooms?
Breakout rooms in Teams are separate, virtual rooms within a meeting that groups of meeting participants can move to during the meeting. These groups can then rejoin the larger meeting later. Meeting organisers can also move freely between these rooms and give them titles to specify what the rooms are for.
What should I use breakout rooms for?
You can decide how you want to make use of the breakout rooms feature, but it may be particularly useful for people running workshops or other sessions that require separate group discussion.
If you intend to use breakout rooms with your students, please read the "Keeping students safe while using Teams for distance learning" drop-down below. This provides some guidelines and recommendations on ensuring your student's safety while using Teams.
What types of meeting are breakout rooms available in?
Breakout rooms are available for:
- Scheduled meetings
- Channel and non-channel meetings
- Ad-hoc meetings set up via the meet now button
- Webinars
Breakout rooms are not available for:
- Calls in Teams
- Live Events
What can meeting organisers do with breakout rooms?
Note that organisers must use the Teams desktop app to set up breakout rooms, as the feature is not yet available on the Teams broswer version.
Meeting organisers can:
- Create upto 50 breakout rooms within scheduled or meet now meetings
- Move between breakout rooms freely
- Add, move and delete breakout rooms
- Give breakout rooms titles
- Decide if participants are automatically added to breakout rooms or if the participant needs to confirm
- Reassign participants to different rooms when rooms are open and when they are closed
- Have access to all breakout room artifacts (chat, files, recordings)
- Set a timer for breakout rooms
What can meeting participants do with breakout rooms?
Note - breakout rooms are not private chat spaces, while only the participants that are assigned to a room can see and hear the conversations and presentations in that breakout room, the meeting organiser can always see this.
Participants can:
- Join breakout rooms from Teams for browser, desktop and mobile
- Share content (PowerPoint presentations, Whiteboards) in the breakout room
- Chat in the breakout room (this will only be visible to those in the room and the meeting organiser)
Participants cannot:
- Move freely between breakout rooms and the main meeting. Participants must wait until the organiser brings them back to the main meeting or reassigns them to another breakout room.
How do I create breakout rooms in my meeting?
You can only create breakout rooms if you are the meeting organiser and you must be using the Teams desktop app to create breakout rooms
- If you are the meeting organiser you can create breakout rooms at any point after you have joined the meeting by clicking the "Breakout rooms" icon (shown in the image across)
- You can choose to create all your rooms at the start or create only one at the start and add more later
- You can then name, join and delete your breakout rooms by clicking the room and selecting the appropriate option
How do I assign participants to breakout rooms?
- When you first set up your breakout rooms you can choose to automatically assign participants (this will evenly assign the participants across the rooms) or you can manually add participants
- To manually assign participants click the breakout rooms icon and click assign participants
I can't see the breakout rooms feature, why is this?
Breakout rooms for Microsoft Teams is in general relase by Microsoft and only requires that you have the latest Teams Desktop app. If you can't see breakout rooms and you urgently need to make use of this feature, please check the prerequisites below:
- Make sure you are using the latest Teams Desktop client by:
- Clicking "Settings and more" to the left of your profile picture / initials
- Then, click "Check for updates"
- Then, wait until a banner with a "Refresh Teams" link appears, and click this link. If this banner does not appear and instead states "You have the latest updates", you have the latest version of Teams.
Captions
Teams has a feature which allows you to turn on live captions during your meetings. The live captions include speaker attribution, meaning it will be explictly stated in the captions which meeting participant is speaking.
Live captions are only currently available in English (US).
To turn on captions, click the "More options" ellipsis during your meeting and select "Turn on live captions" from the list. This can be turned off by selecting "Turn off live captions".
Further information on Live Captions from Microsoft
Transcription
Live Transcription
Live Transcription for private meetings (meetings that do not have a channel added) is rolling out to our tenant now.
Note - live transcription is not yet available for channel meetings or 1:1 calls.
If you are a organiser or presenter in a meeting, you can turn on Live Transcription during your meeting.
Turning on live transcription will record everything that is said in the meeting and who said it, so it is important that you let all participants know that you will be transcribing the meeting beforehand. All participants in the meeting will see a banner informing them that the meeting is being transcribed (as shown below).
To turn on live transcription:
- Click "More actions" (ellipsis icon) on the meeting bar
- Then, click "Start transcription"
- Then, a Transcript box will appear to the right of the Teams window
When a meeting participant speaks, what they have said will show up under the transcription box beside their name and the time that they said it.
Please note that as this auto live transcription, there is a possibility that there will be errors in what meeting participants have said.
Transcription after the meeting
You can get a transcription of your Teams meeting after the meeting is finished. You must record the meeting, while the meeting is taking place, for this feature to be available and only the recorded parts of the meeting will be transcribed.
Note, how you get this transcription will differ depending on your Microsoft license. To check your license, click "Subscriptions" in your Office 365 Profile: My account.
Users with A3 licenses
Your Teams meeting recording will be automatically saved to Stream after your recording is stopped in Teams.
To get your transcript,
- Log into Microsoft Stream and access My videos
- Then, scroll to find the recording you need the transcript for and click "Update video details" (icon of a pen) to the right of the video
- Then, under the "options" heading, beside "Captions", click "Download file"
- Your transcript will be downloaded to your computer and can be edited
Users with A1 licenses
Your Teams meeting recording will be uploaded to Teams itself. This recording will be available to download for 21 days.
To get your transcript,
- First download the recording from Teams within these 21 days
- Then, log into Microsoft Stream
- Click the "Create" tab and select "upload video"
- Either drag the video file into the box or click "browse" and select the video file
- Add your video details (name, description, change permissions
- Click "publish"
- Go to "My content" and select videos
- The uploaded recording should be the first video in the list
- Click "Update video details" (icon of a pen) to the right of the video
- Then, under the "options" heading, beside "Captions", click "Download file"
- Your transcript will be downloaded to your computer and can be edited
Large Gallery Mode
You can now turn on large gallery mode during Teams meeting to allow up to 49 participants videos to appear at once. This feature is available on the Teams desktop app and on the Chrome and Edge browsers.
Prerequisites to enable large gallery:
- Only available in the Desktop version of Teams
- At least 10 participants must have their video turned on
- You must have "Turn on new meeting experience" checked in your settings
Coming Soon - Large gallery mode will soon support up to 98 participant video feeds. When large gallery mode is selected in a meeting with more than 49 video feeds, users will be able to move to another page of video feeds to see up to a further 49 video feeds. This is expected to roll out by mid-July 2021.
How to turn on large gallery mode in your meeting
Together Mode
Together mode has now fully rolled out to all users at the University and is no longer in preview mode. This feature is available on the Teams desktop app and on the Chrome and Edge browsers.
This feature can be turned on during your Teams meetings by clicking the "more actions" ellipsis on the meeting bar and selecting "Together mode".
Together mode places all meeting participants who have their video feeds on in front of a single shared background (such as a auditorium). This makes it appear as though everyone is together in one room.
At least 5 participants must have their video feeds on to use this feature.
If you are a meeting organiser, you now have the ability to lock your Teams meeting during the meeting. When you lock your Teams meeting, no further participants will be able to join the meeting and will instead see a message telling them the meeting is locked. You can also unlock the meeting at any time during the meeting.
An example of a use for this feature is that you could choose to do this after all invited members have joined to ensure the meeting is as private as possible.
Lock your meeting
- While in your meeting, click the "Show participants" button (icon of 2 people) in the meeting bar
- Then, click the "More actions" button (icon of an ellipsis) to the right of the "Participants" heading
- Then, select "Lock the meeting"
- A warning message will appear, click "Lock"

Unlock your meeting
- Click the "Show participants" button (icon of 2 people) in the meeting bar
- Then, click the "More actions" button (icon of an ellipsis) to the right of the "Participants" heading
- Then, select "Unlock the meeting"
- A warning message will appear, click "Unlock"

During your Teams meetings you can use the meeting chat to chat with the other participants in the meeting. All messages added to this chat will be accessible after the meeting.
To access meeting chat during the meeting, click the chat button on the meeting bar.
Chat Bubbles
Chat bubbles show on screen during a Teams meeting, when a chat message is posted. These chat bubbles will appear for a brief time at the top of the meeting window before disappearing. The chat message will still be available to view in the meeting chat.
If you do not want chat bubbles to show, you can turn them off by clicking "More actions" and selecting "Don't show chat bubbles".
Disable Chat
To disable chat for your meeting open Meeting Options and change "Allow meeting chat" to disabled.
Chat membership pemissions for non-channel meetings
Meeting chat membership permissions have changed for non-channel meetings. A user's meeting chat membership permission is now based on how they are added to / have accessed the meeting.
For single occurence meetings
Users invited to the meeting - have access to the chat before, during, and after the meeting.
Users forwarded the meeting invitation - have access to the chat before, during, and after the meeting.
Users added via the Invite someone field on the Participants pane - will have access to the chat from the time they join to the time the meeting ends. They will not be able to see chat that takes place after the meeting ends.
Users who are provided with a meeting link - will have access to the chat from the time they join to the time the meeting ends. They will not be able to see chat that takes place after the meeting ends.
For recurring meetings
Users who are invited to the full series - have access to the chat before, during, and after the meeting (up to the 1000-person limit).
Users who are forwarded the invite of a single occurrence of the series
Users who are added via the Invite someone field on the Participants pane during the meeting - have access to the chat from the time they join to the time that meeting instance ends. They will not be able to see chat that takes place after the meeting ends.
Users who are sent a meeting link to one occurence - have access to the chat from the time they join to the time that meeting instance ends. They will not be able to see chat that takes place after the meeting ends.
How to give users access to the meeting chat after the meeting
You can give the user access to the meeting chat if they need this.
To do this:
- Open the meeting chat in your recent chat list
- Click "View and add participants" (icon of two people and a plus icon) in the upper right of the teams window
- Then, click "add people"
- Then, in the add box, type the name or email of the user who needs access.
- Then, select "Include all chat history" and click "Add"
- Finally, type a new message into the chat so that the user will see that chat
Meeting options are available to meeting organisers before and during a Teams meeting.
Meeting options can be accessed by double-clicking your meeting in the Teams calendar, then clicking "Meeting options" (this will either be beside the timezone information or you may have to click the ellipsis beside "Copy link").
The current options are:
- Who can bypass the lobby
- Always let callers bypass the lobby
- Announce when callers join or leave
- Who can present?
- Allow mic for attendees?
- Allow camera for attendees?
-
Allow meeting chat
-
Allow reactions
All these options can be changed. If you make changes, remember to click "Save" at the bottom of the meeting options page when you are finished.
Who can bypass the lobby
This option is auto set to "People in my organisation and guests".
You can change this to:
"Only me" - if you want all your attendees to wait in the lobby.
"People I invite" - if you only want people directly invited to the meeting to be able to bypass. Note this setting will turn off allow forwarding of the meeting invite.
"People in my organisation" - if you only want other University of Edinburgh users to bypass but not external guest users.
We recommend you do not change this setting to allow "Everyone" to bypass the lobby, for security reasons.
Always let callers bypass the lobby
This option is auto set to "No". We recommend you leave this setting as it is, for security reasons.
Announce when callers join or leave
This option is auto set to "Yes". We recommend you leave this setting as it is, for security reasons.
Who can present?
This option is auto set to "Everyone". For most meetings, we recommend that you change this to either "Specific people" (if you need certain people to be able to present) or "Only me".
Changing this setting as recommended, will add all other users as "attendees" to the meeting. This prevents them from being able to share content, record the meeting, mute or remove other users. Chaning this setting as recommended, also allows you to prevent attendees from unmuting, only allowing them to unmute when requested (note you need to apply this setting, it is not automatic).
Allow mic for attendees?
This option is auto set to "Yes".
Changing this setting to "No", prevents all attendees from unmuting their microphone during the meeting. This setting will only apply if you change the "Who can present?" setting above to "Specific people" or "Only me".
The Meeting organiser can then access the participant list during the meeting, click the ellipsis beside an attendees name and "Allow mic", if that user wants to speak. This may be most useful in a webinar, presentation, Q&A type of meeting for example.
Allow camera for attendees?
This option is auto set to "Yes".
Changing this setting to "No", prevents all attendees from turning on their video feed during the meeting. This setting will only apply if you change the "Who can present?" setting above to "Specific people" or "Only me".
The Meeting organiser can then access the participant list during the meeting, click the ellipsis beside an attendees name and click "Allow camera". This may be most useful in a webinar, presentation, Q&A type of meeting for example.
Record automatically
This option is auto set to "No".
Changing this setting to "Yes", will mean that your meeting will start recording automatically, as soon as the first person joins the meeting. This may be useful if an entire meeting needs to be recorded and you are worried about forgetting to do so.
Note - You must still inform all meeting participants that they will be recorded from the moment the meeting starts. You must do this before the participants join the meeting, so that they are able to consent to being recorded.
Allow meeting chat
This option us auto set to "Enabled". If you do not want the meeting chat to be available, you can set this to "Disabled". However, note participants will not be able to posts any questions, files, or comments during the meeting.
Allow reactions
This option is auto set to "Yes". This means that participants can select to have a thumbs up, a heart, applause or a laughing face show as a reaction to what is being said during the meeting. This will either show over the person who selected it's video, or float over shared content.
If you do not want this setting to be available, change the option to "No".
You can access a participants list within your Teams meeting.
To access this, click the "Show participants" button (icon of people) on the meeting bar.
From here you will see a list of participants and you will see anyone who has raised their hand to speak at the top of the list. You can also search for a specific participant by typing their name in the search box.
You can take actions on specific participants from this list, including muting them.
Microsoft have now added a feature allowing you to add polls before and during Teams meetings using the Forms app.
For help with how to add the Forms app to your meeting and how to create polls before and during your meeting, see the following from Microsoft:
Raise hand
The raise hand option in Teams meetings is useful as it allows you to signal to the person hosting the meeting or just to the other participants that you want to say something without interrupting.
Everyone in the meeting will be able to see that you have your hand raised.
You can raise your hand in a Teams meeting. To do this:
- Hover over the icon if a smiley face and a hand on the meeting bar
- Click "Raise hand" (icon of a hand)
You can then lower your hand by clicking on the raise hand icon again.
If you are a meeting organiser or a presenter, you can lower all raised hands in your meeting by:
- Clicking "Show participants" from the meeting bar
- Then, clicking "More actions" (ellipsis icon) to the right of the "Participants" heading
- Then, clicking "Lower all hands"
Live reactions
You can react during a meeting by selecting one of the available reaction emojis. When you select one of these reactions, all meeting participants will see your reaction.
To use reactions hover over the icon of a smiley face and a raised hand along the meeting bar, and select the reaction you want.
The available reactions are:
- Like (thumbs up emoji)
- Heart (love heart emoji)
- Applause (clapping hands emoji)
- Laugh (laughing face emoji)
Meeting organisers can turn off the ability for participants to use reactions in meeting options.
Important Information
- There is a known issue which prevents users from seeing the "Start Live Transcription" option in their Teams app. This feature is expected to be rolled out by August 2021.
- Teams meetings recordings are not on by default and must be turned on by someone in the meeting.
Before recording a Teams meeting
Before starting a recording you are legally required to let everyone in the meeting know. Teams will also show a notification banner (shown below) across all meeting attendee's screens to tell them they are being recorded.
We strongly recommend that you read our "Guiding principles - recording of Online and Digital Events on the Online and Digital Events pages. This will give you information on what to consider when recording meetings:
Guiding Principles - Recording of Online and Digital events
You should also read through our Privacy Notices for recording online and digital events, and have your attendees read them:
Privacy notice for recording online and digital events (external collaborators) (40.74 KB PDF)
How to record your Teams meeting
Microsoft provide up to date guidance on how to record your Teams meetings:
Where is the recording saved?
Users with an A1 License (most users)
Recordings are held and available for download in the Teams chat for your meeting or in the Channel the meeting was held in, for up to 21 days before deletion.
Note that following this deletion, your meeting recording will not be recoverable. If you need this recording please download it within the 21 days, and upload it to a Team or SharePoint site if needed.
Users with an A3 License (users who have access to MS Bookings, etc)
Recordings are automatically uploaded to Microsoft Stream.
Further information on Stream is available here.
Changes by July 2021
The way all Teams meeting recordings are saved will change in July 2021. All Teams meeting recordings will be saved to either OneDrive or SharePoint, depending on how the meeting was scheduled.
Further information on how this may affect you is available on our Teams Meeting Recordings on SharePoint and OneDrive page.
Where can I access the recording after my meeting?
Through the Teams Calendar
Currently, this method is only available when the person who starts the recording has an A3 license. This will change following the move to recordings being saved in OneDrive and SharePoint.
You can access the recording after the meeting has ended by double-clicking the meeting in the Teams calendar.
The recording will show under the "Details" tab. It will show as a button below the date and time of the meeting, labelled "Recording".
From the meeting chat / channel
If you added a Channel to your meeting, the recording will appear below the post showing the meeting information in the channel.
If you did not add a channel to your meeting, the recording will appear in the meeting chat. This can be accessed by clicking "Chat", then clicking the chat with the same name as the meeting.

Sharing your screen / window
You can share your screen during a meeting by clicking the "Share" icon (an icon with a rectangle and an arrow) located on the meeting bar.
There are various options for what you can share, including your whole screen, a different screen if you use multiple screens or a specific window that you have open (i.e., your web browser).
To stop sharing your screen click the "Stop Sharing" button
For further information on sharing your screen during a Teams meeting, see the LinkedIn Learning video on screen sharing in Teams (requires you to sign in with your University log-in details):
Share your screen during a call, meeting or chat
Sharing a PowerPoint Live presentation
Note - this method of sharing is only available for .ppt files. If you have another type of presentation file, you can either change this to a .ppt file or you must share the presentation as part of your screen.
Sharing presentations in Teams meetings have changed slightly. You can now share "PowerPoint Live" presentations. These will allow for more interactivity when presenting a PowerPoint in a Teams meeting.

Sharing the PowerPoint
You can share a PowerPoint Live presentation during your meeting by:
- Clicking the "Share" icon (an icon with a rectangle and an arrow) located on the meeting bar.
- You will then see a list of your recently used PowerPoint files under the "PowerPoint Live" header. You can either select the PowerPoint you want to share from here. Alternatively you can find your PowerPoint by browsing onedrive or your computer, these options will appear at the bottom of the list of PowerPoint files.
- When finished presenting, click the "Stop presenting" button
Options when the PowerPoint is shared
When you share your PowerPoint Live, you as the presenter will see the slide you are currently presenting to the attendes in its own box, as well as all your slides in a row beneath the current slide. All other participants will only see the presented slide.
You can move through your slides by:
- Clicking the box showing the currently presented slide, moving you onto the next slide or
- By clicking the slides in the row beneath the presented box. With this method you can jump to later slides in your presentation (for example, you can jump from slide 2 to slide 5, by clicking slide 5 in the row).
You will also be able to see any notes you have added to your PowerPoint, to the right of the slide you are currently presenting. All other meeting participants will not be able to see your notes, so you can add anything in your PowerPoint notes that you want to have in front of you but don't want to have in your slides.

Annotations and virtual pointer
Rolling out now to PowerPoint Live in Teams meetings is the ability to annotate and use a virtual pointer while sharing your PowerPoint Live.
You can now:
- Use a virtual pointer - This allows you to point at and briefly highlight specific content in your slide, as if you were using a pointer during a live presentation
- Annotate your slides - This allows you to annotate your slides with a virtual red pen
- Highlight your slides - This allows you to highlight parts of your slides and keep them highlighted throughout the presentation

Slide Translation
This new slide translation feature allows all meeting attendees to translate the PowerPoint Live presentation into a language of their choice.
This will convert the slide show content into one of nineteen languages that the attendee selects. For example, the attendee can choose French, German, Italian, Japanese, Russian, Hindi, Irish, Korean, etc. This will not change the language of the slides for anyone else in the meeting, only that attendee.
Features coming soon to PowerPoint Live in Teams
Standout mode
Presenters who have their cameras on during a meeting, will be able to select standout mode when presenting their PowerPoint Live. This will mean that the presenters video feed is superimposed over the foreground of the PowerPoint Live presentation. You can see an example of this in the image across.
This is rolling out now.
Include device sound when sharing
Desktop / browser
By default, when you share content in a meeting, device sound will not be shared. There is an option in Teams which allows you to turn this on, if you wanted to share a video for example.
To do this click the "Include computer sound" toggle within the "Share content" button before selecting what you are going to share.
This is available for both Windows and Mac users.
Note - When Mac users click the "include computer sound" toggle for the first time, they will be prompted to install a driver to allow this to work.
Mobile app
You can now include device sound when sharing your screen on the Teams mobile app.
To do this, click the "Audio" toggle beside share screen.
Further help with sharing content
For further help with sharing content during your meetings, including sharing a whiteboard and giving/requesting control of presenting, see the following:
You can spotlight yourself or other participants in your meeting to keep them on screen for all participants. This can be useful when a participant, or multiple participants are presenting something and you want me to keep their video feeds on screen.
You can spotlight up to 7 participants
To do this:
- Hover over the user's video feed
- Then, click "More options" (ellipsis icon) that shows beside their name
- Then, select "Spotlight"
- A prompt will appear asking if you want to spotlight the user, click "spotlight" again
- To stop spotlighting the user, click "More options" (ellipsis icon) again and select "Stop spotlighting"
Teams Meeting tips
Sometimes you may want to be able to suppress back noise in your Teams meetings. This feature is available within Teams itself, on the desktop client version of Teams. If you are on a Mac, you may have to update your Teams desktop client to see this feature.
You can turn on background noise suppression through your device settings in the Teams desktop client.
There are different options of noise suppression that you can choose from:
- Auto (default) - The Teams app decides on the best level of noise suppression based on local noise
- High - Suppresses all background sound that isn't speech. This option may be useful if, for example, you have a window open and there is a lot of noise outside. There are some prerequisites to using this option:
- The High option is not available where the meeting is being recorded or live captions is on
- High requires that your computer's processor must support Advanced Vector Extensions 2 (AVX2).
- The high option is currently not available for Mac devices using an M1 ARM processor.
- High also uses more of your computer's resources
- Low - Suppresses low levels of persistent background noise
- Off - Noise suppression is disabled
Note - some users may experience issues in their Teams meetings when noise suppression is turned on. If you are experiencing an issue, such as other participant's voices sounding robotic, try turning off noise suppression.
Further information on how to turn on noise suppression in Teams
Teams meeting etiquette guidelines
Some useful examples of meeting etiquette have been shared by Peter Kent @ JISC:
Turn off your video if you don’t need it - If the video and audio quality of your online meeting is poor, then turn your video off.
Maintain good information security practices - Make sure you don't have any sensitive documents or other information in sight of your camera. You can blur your background during Teams meetings by:
- Clicking "More actions" (icon with 3 dots)
- Then, selecting "Blur my background"
If you’re sharing your screen make sure you close any applications which display sensitive information before you share.
Mute your microphone when you join - Have your microphone muted when you join a meeting and only turn it on when you start talking.
Mute your microphone during the meeting - Whenever you’re not talking during the meeting, mute your microphone to save the other meeting attendees from hearing any background noise.
Create an agenda for your meeting - Creating an agenda before a meeting can help prevent meeting attendees from cross-talking.
When asking questions direct them to particular people - If you have a question it may be best to ask a specific meeting attendee, rather than asking generally and having everyone talk over each other.
Have attendees use the "Raise Hand" icon if they want to ask a question - Attendees can now use the Raise hand button to indicate that they want to speak or ask a question. This can prevent attendees from talking over one another and allows the meeting organiser to keep the meeting structured.
Tell participants if you record your meeting - Recordings are not on by default, it is a choice to turn on meeting recordings. If you want to record a meeting, you legally must tell your participants when you begin recording the meeting and let anyone who comes into the meeting later know that they are being recorded. If you are unclear on this, please consider your own local guidance on data collection, or University policy on this.
For further information on online meeting etiquette, have a look at the GoodPractice online meetings guide (requires your University log-in details):
How to make Virtual Meetings work
Also the following LinkedIn Learning videos (requires you to sign in with your University log-in details):
Please read through the following information to help keep your meetings in Teams private.
Guiding principles of privacy in meetings
Misuse could lead to disciplinary - Listening to a meeting to which you're uninvited to join could lead to disciplinary action against you. Meeting organisers can identify attendees joining their meetings in Teams and will know if you join. If you accidentally join a meeting to which you are uninvited, you should leave immediately and inform the meeting organiser.
Limit who you send a meeting invite to - Meetings in Teams are like any other resource, if you provide people with a link to the resource (in this case a Teams meeting) then they are able to use that resource. Therefore, we recommend that you think about and limit who you send join links to.

Make your meeting "private" in Outlook - by default, if you include your link in a meeting in your Outlook calendar, then other staff or students can see the link, click on it and could join your meeting unexpededly or by mistake. If you host a meeting which deals with sensitive information then make the meeting appointment in your Outlook calendar private. The meeting will then show in your calendar with a padlock beside it (shown in the image across). Guidance on making your meeting private is available from Microsoft:
How to make your meeting private in Outlook

Anonymous users will wait in a lobby - If you have an anonymous user (someone who doesn't have a University of Edinburgh account and isn't a guest user) joining your meeting, the anonymous user will be sent to wait in a "lobby" from which the meeting organiser can either accept or reject them. Make sure you know who the anonymous user is before accepting them.
Dial-in users will wait in a lobby - If you are set up as a conference meeting organsier and have someone dialing into your Teams meeting, they will also be sent to the lobby before accessing the meeting. From here the meeting organiser can accept or reject them. Make sure you are expecting someone to dial in before accepting them.
Meeting organisers should verify attendees during the meeting - We recommend that if you are the meeting organiser, you should verify that everyone attending the meeting is supposed to be there frequently during your meeting. Guidance on how to do this is included below.
Lock your meeting when all participants have joined - We recommend that meeting organisers look their meeting when all meeting participants have joined. This will prevent anyone else from being able to join the meeting. Guidance on this is available under the "Lock your meeting" drop-down above.
Privacy guidance for Meeting organisers
Meeting Options before your Meeting
If you are a meeting organiser then you can access meeting security options after you have set up and sent your meeting invite to your attendees.

Access your calendar in Teams, locate your meeting and click it. Then click the "Meeting Options" button beside the Time Zone information and a new page will open in your browser.
The meeting options are:
- "Who can bypass the lobby" - this will be set to "People in my organisation" which means that anyone who does not have a University of Edinburgh or guest account will be sent to a lobby before being accepted to the meeting. Always keep this option set to "People in my organisation" for security reasons (as shown below).

- "Always let caller bypass the lobby" - this will be set to "No", this means that people who dial in to your meeting (if you have this feature set up) will always be sent to the lobby and the organsier will have to accept them to the meeting. Always keep this set to "No" for security reasons (as shown below).

- "Announce when callers join or leave" - this will be set to "Yes", this setting means that if someone were to join your meeting as the organiser you will always know about it. Always keep this set to "Yes" for security reasons (as shown below).

- "Who can present" - this will be set to "Everyone", this setting means that everyone in your meeting has the same permissions as the meeting organiser. All meeting participants will be added as "presenters" by default. We recommend that you change this setting to "Specific people" or "Only me", this means that participants will be added as "attendees" with fewer permissions. For further information on the various roles in Teams meetings see this page.
To change participant roles:
- First, click "Everyone" beside "Who can present" to open a drop down list
- Then, click "Specific People" or "Only me"
- Next, if you selected "Specific people" typing the names of the participants that you want to be presenters into "search for participants"
- Finally, click "save" at the bottom of the window

Verifying attendees during your meeting

If you are a meeting organiser, you should check who is attending your meeting frequently during your meeting.This allows you to verify that everyone attending is supposed to be there, just like in a physical meeting. To do this, click the "Show participants" icon (icon of 2 people) on the meeting bar, and check the meeting attendees listed under "Currently in this meeting". You will see their name, their profile picture, their contact details and department, when you hover over their profile picture or initals
If there is someone attending your meeting who should not be, you will be able to see them.
Scheduling meetings in a Private Channel
The ability to schedule private meetings is likely coming to Teams in the future.
Upvote this feature to help Microsoft prioritise it's release:
Support to host a meeting in a Private Channel
Currently there is no timeframe for release of a private meetings feature. However, Microsoft has announced that they're working on it. You can place a 'watch' on articles relating to this so that you will be alerted by email if the status changes. Further related articles and a work-around are included below:
Scheduling meetings in Private Channels query
Up to date information on Private Channels
Work around to schedule meetings in private channels
There is a work around that allows you to schedule meetings in private channels before the feature is implemented by Microsoft.
To do this:
- Access your Team and your Private Channel
- Then, click the "Meet Now" button (icon of a video camera) on the bar below the "Start a new conversation" box
- Then, type your Meeting title into the "Want to add a subject?" box that appears click "Meet now"
- Then, copy the meeting join info by clicking the "Copy join info" button (icon of 2 linked chains) beside the "Invite someone" box on the right of your window
- Next, hang up the meeting by clicking the "Hang up" button (icon of a red telephone)
- Then, open your Outlook, change to calendar view and create a new Outlook meeting invite
- Next, manually add everyone in your private channel to the meeting invite
- Then, add the rest of your meeting details and paste the join info that you copied earlier into the message
- Next, send the Outlook meeting invite
- Then, when the meeting is due to start, click the meeting in your Outlook calendar
- Finally, click the "Join Teams meeting" button in the message
A video tutorial for this workaround has been posted to youtube:
Can I use Microsoft Teams for teaching?
At the University of Edinburgh, we recommend that you use Collaborate for any content related to teaching and curriculum. Collaborate is integrated with the learning environment and so gives a much more seamless experience for your students.
If you need further information and help with using Collaborate for teaching, please see the following pages on the University website: Collaborate – Virtual Classroom.
Generally, Microsoft Teams should be used at the University for non-teaching content. However, if you need to use Microsoft Teams to meet with your students then we have some guidelines and recommendations that you should familiarise yourself with before meeting with your students. These guidelines and recommendations will show you how you should prepare your meetings and what you can do whilst in your meetings to help keep your students safe.
What are the guidelines and recommendations?
Please read through and use the following guidelines and recommendations to help keep your students safe while using Teams for distance learning. These guidelines are split into things you can do to prepare before your meeting, during your meeting and at the end of your meeting.
Before your meeting
How can I make sure Teams is secure for my students?
Keep Teams on your devices updated – If you use the desktop or mobile versions of Teams make sure you check frequently that you have the most up-to-date version. You should also ask your students to do the same. Keeping Teams updated on all your devices makes sure you have all newly released features of Teams (including security features) and the best protection. Normally updates to the desktop app will be installed automatically but you can check manually by following Microsoft’s steps in the link across. For further information please see Microsoft’s “Guidance on updating Teams”.
How can I make sure my meetings with students are kept private?
Ensure your meetings are as private as possible – Meetings in Teams are very secure however we have some guidelines that you can follow to help keep your meetings with your students as private as possible. Examples of some steps you can take to keep your meetings private are limiting who the invite is sent to, making your meeting private in Outlook so that it cannot be joined except by those invited and checking your attendees frequently. For further information and guidance, please read through “Privacy and your meetings”.
Can I change my Teams meetings settings so that my students have less permissions during our meetings?
Change the roles of your students in your meetings – Before having your meeting with your students we strongly recommend that you change the “Who can present?” meeting option to only me or specific people. By changing the “Who can present?” option you can set roles in your meetings with your students, allowing you to be the presenter and your students to be the attendees. This means that only you can record, share content and mute all attendees. For further information and help with this please see “Who can present at my meetings?” under our “Teams Meetings FAQs”.
Can I have my students wait in a lobby before our meetings?
Change who can bypass the lobby in your meetings – If you would prefer to admit your students one by one to your meetings you can change the “Who can bypass the meeting?” meeting option to only me before your meeting. Changing this setting to only me means that all your meeting attendees will wait in a meeting lobby until you admit them to the meeting. For further information and help with this please see “Can I change who has to wait in the lobby in my meetings?” under our “Teams meetings FAQs”.
During your meeting
Are there guidelines if I want to record my meetings with my students?
Recording your meetings – You can record your meetings with your students, and by following the steps above beside “Change the roles of your students in your meetings” only you will be able to record the meeting. If you want to record your meetings with your students, please familiarise yourself with “Guiding Principles – Recording of online and digital events” and “Recording your meetings” guidance before doing so. Please note that if you intend to record your meetings you will have to get your student’s consent to record their videos or have all your students turn their videos off.
What guidelines should I follow during my meeting?
Check the participants list – Make sure to check the list of participants in your meeting frequently to make sure you know who is attending your meeting and that you do not have any unexpected participants. Help with this is available under “Privacy and your meetings”.
Ask your students to pin your video – You should ask your students to pin your video during your meeting, this way they will always see your video no matter who is talking. Information on pinning videos is available here.
Mute all your students – You should mute all your students at the start of your meeting to prevent background noise and so that you are the only one speaking until you ask your students to unmute themselves.
What should I do if I want my students to present something during the meeting?
Change their role during the meeting – If you want your students to be able to present during your meeting you can do this. We recommend that you still change the meeting roles before your meeting so that all students are added as attendees (read “Change the roles of your students in your meetings” above for this). Then, during the meeting you can change the student who needs to present to a presenter then when they are finished presenting you can change them back to an attendee. Information on how to do this is available
Ending your meeting
How should I end my meeting?
Make sure to click end meeting – When your meeting is over click “End meeting” instead of “Leave meeting” by clicking the drop-down arrow beside leave meeting. This ends the meeting for your students as well as for you
Further Help
For in-depth, step-by-step guidance on keeping your students safe while using Teams, please read the following guidance from Microsoft:
Keeping students safe while using meetings in Teams for distance learning
If you are planning to hold a lecture or seminar (teaching), then you should use Collaborate instead of Teams. See the University's Teaching Continuity Preparation web pages for information on using Collaborate for teaching: