Bonding
The quality of the bond between the epoxy resin and the mineral grains is important if the minerals are going to remain embedded during the grinding and polishing process.

Furthermore, to achieve a good conducting path across the sample, the resin must have good mechanical contact with the grains. This electrical conductivity, formed by either C-evaporation or Au-sputtering, is an essential part of the sample preparation before SIMS or EPMA analysis.
This bonding, or shrinkage, has been investigated by looking at the interface between embedded glass spheres and the resin, as well as the resin relationship with its surrounding Al-ring. It is readily acknowledged that this test is rather subjective. Nevertheless, some general observations can be made.
Sample Preparation
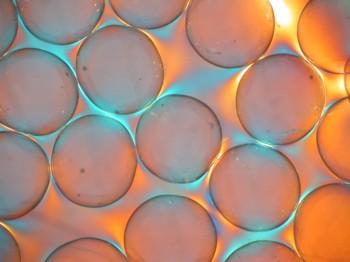
Samples of 10 resins were mounted together with approximately thirty, 1.5-2.5mm glass balls (VWR, Product number 332134Y) in individual 25mm diameter, 5mm deep, Al-rings. The three Beuhler hot press resins; TransOptic, ProbeMet and KonductoMet were mounted with the glass balls but without the Al-rings. The remaining three; Araldite, Araldite quick set and Varian Torr Seal were mounted in Al-rings without the glass balls.
The 13 mounts containing glass balls were then ground so a section could be seen through the balls using Beuhler UltraPrep nickel bonded diamond 74 micron and 20 micron discs followed by 1200 and 2500 silicon carbide paper. They were polished with 3 micron diamond for 15 minutes and then with 0.3 micron Al-oxide for 10 minutes, washed and then ultrasonically cleaned with 10% Decon 90. All of the resins were treated in an identical manner and were all polished together on the same cloth. The samples were finally cleaned with ethanol before carbon coating using a Deton coater to produce a thin conducting film across the sample surface.
Bonding
The resin's bonding to the glass balls was examined by an optical microscope (Leica DM***) in reflected light. The images presented are representative of the sample. The gap between the glass and the epoxy was then confirmed and accurately measured using a Philips XL30CP Scanning electron Microscope, in secondary electron imaging mode. Again, the gaps quoted and images recorded are believed to be representative of the sample concerned.
| Epoxy Resin | Typical Gap Measurements |
|---|---|
| EpoThin | 1.96um 6.66um 4.49um |
| EpoHeat | 11.93um 11.30um 12.70um |
| EpoxiCure (Cured at Room Temperature) | 1.02 0.96 0.72 |
| EpoxiCure (cured at 65'C) | 7.32um 8.54um 6.16um |
| TransOptic | 6.01um 4.52um 1.55um |
| ProbeMet | Difficult to measure due to imhomogeneity of material |
| KonductoMet | Difficult to measure due to imhomogeneity of material |
| SpeciFix-20 | 2.92um 2.40um 3.20um |
| EpoFix | Very difficult to measure all < 1.00 |
| Ciba Geigy MY778 & HY951 | 0.52 0.49 0.68 |
| Robnor Resins PX771c | 3.18um 2.80um 3.63um |
| Korapox 439 | 1.68um 1.77um 1.59um |
| Petropoxy | 1.00um 0.67um 0.34um |
Polishing Relief
The effect of polishing was investigated by measuring the difference in height between the epoxy resin and adjacent glass balls. The measurement was made using a Tencor alpha-step 200 profileometer. The position of the glass-epoxy interface was confirmed by optical microscopy. All of the resins were polished together on the same cloth, at the same time, for the same duration. The profile(s) presented are believed to be representative of the sample.
| Epoxy Resin | Typical Relief Measurements | Profile |
|---|---|---|
| EpoThin | 5.9um 5.4um 4.6um | |
| EpoHeat | 5.0um 4.8um 3.9um | |
| EpoxiCure (Room Temperature) | 1.8um 1.7um 1.7um | |
| EpoxiCure 65'C | 2.9um 2.7um 2.8um | |
| TransOptic | 5.1um 6.0um 5.8um | |
| ProbeMet | 2.0um 1.5um 1.2um | |
| KonductoMet | 1.5um 1.0um 0.5um | |
| SpeciFix-20 | 1.5um 1.4um 1.3um | |
| EpoFix | 1.8um 1.9um 1.7um | |
| Ciba Geigy MY778 & HY951 | 2.2um 1.7um 1.6um | |
| Robnor Resins PX771c | 1.9um 1.8um 1.7um | |
| Korapox 439 | 5.3um 5.9um 5.5um | |
| Petropoxy | 2.9um 2.6um 2.5um |

