Add assessment
Guidance on adding a new assessment within EUCLID.
Introduction
Before beginning it is useful to be familiar with the course structure you are setting up and what level this will be created at. Course assessments can either be created on their own, i.e. a top level item of assessment that a single mark would be keyed against or they can have further structures sub-levels, i.e. components and items that can have marks keyed against them that are calculated upwards to give an overall mark for the top level assessment.
The guidance below outlines the steps needed to create a basic assessment setup. It covers top level assessment setup.
Navigation and retrieval
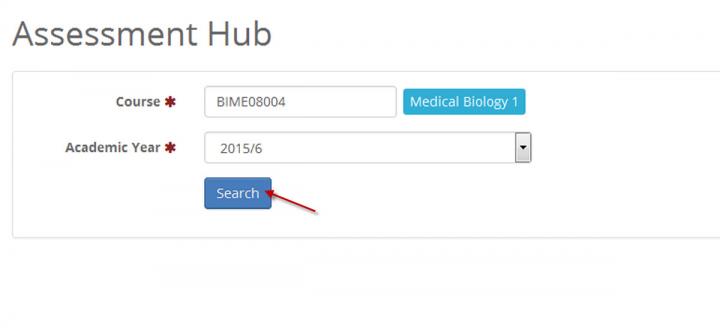
Click on the 'Assessment Hub' link within the 'Students' page:

This will display the 'Assessment Hub' course retrieval screen.
The 'Academic Year' will default to the current year.
Key and select the course title or code that you wish to add a new assessment for within the 'Course' field.
Click on the 'Search button:

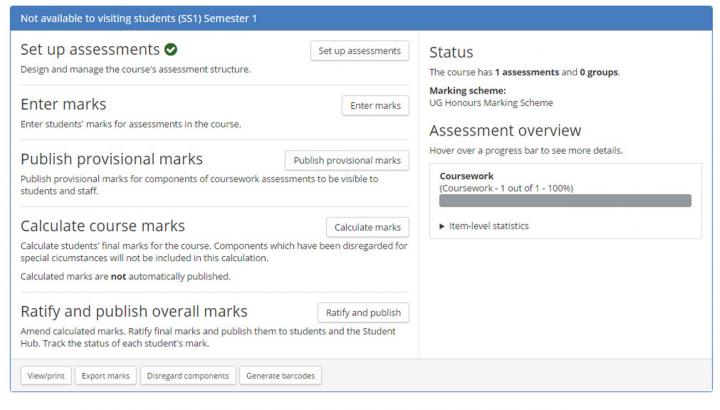
This will return the 'Edit by course instance' screen:

"Temp assessments"
If there is no existing assessment structure for your course (i.e. migrated from SMART to EUCLID) then you should see a temporary assessment in place. This will read "Temp assessment - DELETE BEFORE CREATING STRUCTURE".
This assessment has been put in place as the EUCLID system needs one in place to allow it to be visible to you. Please delete this assessment before you create your own assessment. You can find out how to remove assessments by viewing the help page below:
Set up assessments
Click on the '1. Set up assessments' button.
This will display the 'Build structure' drop down menu:

Select the 'Add assessment' option from the 'Build structure' drop down menu.
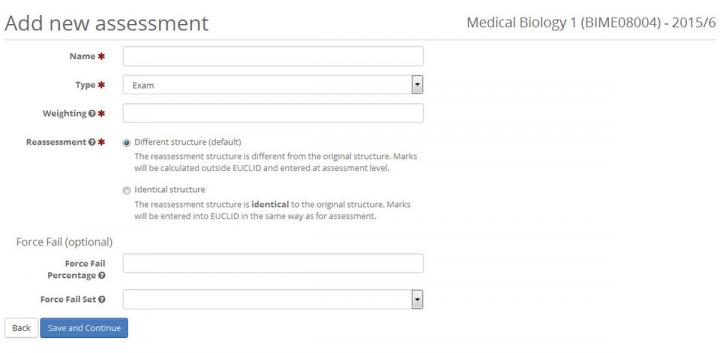
This will display the 'Add new assessment' screen:

Key in the fields available.
Weighting
For a full description of how to complete the 'Weighting' field, click on the link below:
Assessment weighting description
Force Fail
For a full description of how to complete the 'Force Fail' fields, click on the link below:
Assessment Force Fail description
Complete the creation of a new assessment
Click on the 'Save and Continue' button when you have completed the appropriate details.
This will return you to the 'Add new assessment' screen, displying the top level assessment details:

If you only wish to record a top level mark for this course instance your setup may be finished now. This has created the facility to record a single mark against this setup.
However, if you wish to add to the assessment structure, creating sub-levels to your assessment you can click on the '+Add component' button.
To view guidance on adding components to an assessment, click on the link below:
Related pages
Testing your assessment structure

