
Using the Contacts tool
How to add contact details to a course including how to resize a photo.
Your profile image needs to be a specific size (150 x 150 pixels) to use in the contacts tool in Learn.

Resize your photo
If the profile photo needs resizing, or isn’t square, use a piece of image editing software such as “Microsoft Paint” to make adjustments to the size and save it somewhere you can easily find it.
Using MS Paint on Windows to resize your photo
- Right click on the image and select Open with, then Select Paint
- If the image is not square then use the crop tool to crop it to square:
- From Select choose Rectangular Selection from the drop-down menu
- Drag a square over the image area to be kept
- Select Crop
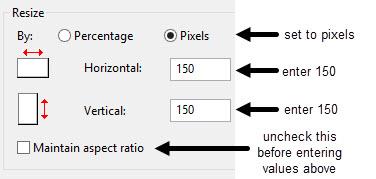
- Select Resize, Select Pixels, set horizontal and vertical to 150 x 150
- Ensure Maintain aspect ratio is not selected
- Set the dimensions
- Select OK to save as a new photo to your local drive

Add your contact information
If you don't already have a page for contact details, then create one by:
- Choose where you'd like to add the contact information. In the Tools menu, you should see a More tools option. Click on it and find Contacts in the list. Click on it.
- Fill in the page details and click Submit.
Once you have a contacts page, you should see a Create Contact button. Click on it and fill in the form with your contact details. Please note, there is a box called Notes which you can use to provide information about your role in the course, or anything else that is relevant.

Scroll down to the OPTIONS part of the form.
- Make the Profile Available: set to Yes
- Click on Browse to upload your profile photo to the Current Image
- Click on Submit to save and close the course contacts tool