
Setting Up and Configuration
Configure your device and log into the Azure Virtual Desktop (AVD) service.
Azure Virtual Desktop (AVD) works by streaming applications to your computer. It works in most browsers on Windows, macOS and Linux.
If you are using Windows 10, 11 or macOS on your computer, you can install a client that will provide an improved user experience such as integration with Start Menu application shortcuts.
You will need to use Multi-Factor authentication (MFA) to access this service.
The first time you connect to the service you will be prompted to setup MFA before you can access the remote applications.
This will only need to be done once.
Configuring the AVD client on Windows 10 & 11
- First connect with the Windows Desktop Client and select your version of Windows. If you are using Windows 10 the most common version will be Windows 64-bit.
- Once the download has completed, open the installer and follow the default prompts.
- When the installer is finished the Remote Desktop client will run – click the Subscribe button
- Sign in with your University Office 365 username and password
- You will be taken to the University Office 365 login page – complete the login
- Once logged in, the client will retrieve the list of apps you are able to use
-
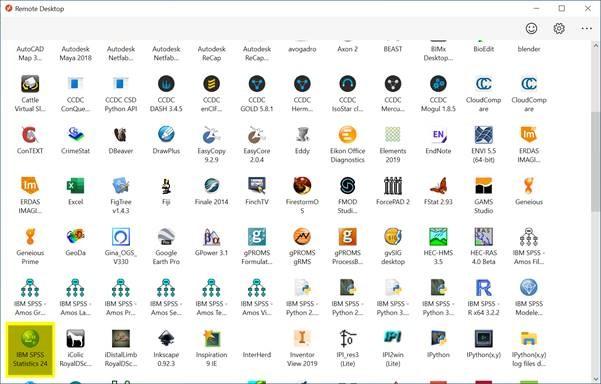
Once the list is refreshed, you can scroll through the apps to find the one you need, double click the icon as you would for a regular application (see the Remote Desktop screenshot)
- For security, you will be asked for your University Office 365 password each time you start an app session (don’t tick the “Remember Me” option as this is not enabled). Please note that if you are starting a session (using a AVD app for the first time since logging off it may take several seconds for the app to load and look like nothing is happening) – the app will load [or you will receive an error] – don’t try to relaunch as this will extend the delay.
- Your application will start and you can begin to use it.
- Ensure that you save your files to OneDrive so that you can best access them in future.

Configuring the Microsoft Remote Desktop client on macOS
- Open the Mac App Store and search for Microsoft Remote Desktop
- You should see the Microsoft Remote Desktop app icon (see screenshot), select install
- Run the Microsoft Remote Desktop client and select Workspaces (see screenshot)

- Select Add Workspace
- Paste in the link: https://rdweb.wvd.microsoft.com/api/arm/feeddiscovery in the area below Add Workspace
- Click the Add button (at the bottom right of the Add Workspace box)
- Sign in with your uun@ed.ac.uk
- The Workspace will be created and the apps will be listed
- To launch an app double click the required app icon
- Ensure that you save your files to OneDrive in order that you can access them again.


Using a Browser to Access AVD
You can use a browser to access applications on AVD. The following system and browser versions are supported, although most HTML5 capable browsers should work.
| Browser | Supported O/S | Notes |
|---|---|---|
| Microsoft Edge | Windows | |
| Apple Safari | macOS | |
| Mozilla Firefox | Windows, macOS, Linux | Version 55 or later |
| Google Chrome | Windows, macOS, Linux, Chrome OS |
To access your list of available apps and launch them, follow these steps:
- Open your browser and visit the Remote Desktop Web Client
- Sign in with your University Office 365 username and password
- You will be taken to the University Office 365 login page – complete the login
- Once logged in, you will be presented with the list of apps available to you
- To start streaming an application, click the app, it will then startup. You may be requested to login again if this is the first app of your session.
-
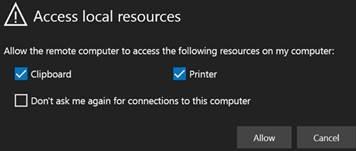
You will be prompted to permit the application access to resources on your device. If you want to be able to copy and paste between applications you need to permit clipboard access. (see the Access local resources screenshot). Note: presently Printer access is not supported.
- Once this stage has passed, the application will load into the browser tab. Applications that are running are displayed using their icon. You can start other applications by clicking on All Resources and selecting the application you need.
- When you are running more than one document in an application, you can access the relevant document by selecting from the list. Note the application icon indicates the number of documents (or application windows) open.
- Ensure that you save your files to OneDrive in order that you can access these files again.
- When you have finished with an application and saved your work, you can close the application as normal by clicking the top right “x”.

Note that if you close the browser tab that AVD is running in before saving all of your work and closing the applications, the applications will remain running on the WVD system until being automatically shut down – this introduces the risk of data loss or corruption.