Preparation advice
We have provided guidelines for preparing samples, as well as some examples to assist you.
Preparation is the key to good analyses. Unfortunately, it's not a science, but an art. We are happy to give advice, so please ask.
6 general rules for preparation
| 1: | Always follow the suppliers recommended mixing ratio, cure temperature and cure time. Ensure that the two components (resin and hardener) are well mixed:- this may take a couple of minutes. Take care in measuring the ratio correctly, preferably by weight, and don't introduce bubbles while mixing. |
| 2: | Do not attempt to make the resin cure quicker, or become harder, by adding more of the hardener component: It does not work! Tests have shown that the opposite is true, adding 30% more than the recommended amount of hardener decreased the hardness of epothin by 12% and specifix-20 by 4%. |
| 3: | Prepare your samples well ahead of your analytical session and keep them dry. Leave epoxy mounts for at least 72 hours before grinding and polishing. Tests have also shown that pump downtime decreases with age of the resin. |
| 4: | Make sure your samples are clean and free of grease. When mounting small grains, clean them in Acetone or Ethanol. See below for options on how to prepare grain mounts. |
| 5: | Post cure heating: Although recommended by some suppliers (e.g. Ciba Geigy - Araldite MY778) to make a harder resin, experiments have shown that the resins do not become harder within the measurement error and the bonding quality of the resin is reduced. |
| 6: | Using Tape: Experience has shown that a good tape to use as a substrate (to mount grains or form a seal with a plastic or aluminium mould) is double-sided Kapton tape (DuPont). It is available from many suppliers, and forms a strong bond without being too thick or sticky and does not deform on a hotplate. |

Reducing polishing relief
It is better to prevent relief rather than correct it! Factors which induce relief during polishing include "soft" polishing cloths (those with a definite pile or nap) or extended polishing times and/or pressure. It is sometimes possible to reduce relief by further polishing with 1-micron diamond. Otherwise, regrind on 1200/2500 grit SiC paper and start the polishing process again.
Elimination of bubbles:
Bubbles are always a problem with small samples. Use of vacuum or pressure just after pouring the resin does reduce the number of bubbles that form. How to make grain mounts: Before mounting, make sure the samples are clean. The best way to clean zirconsis is by ultrasonic in a dilute oxalic acid-water mix, which eliminates adhering Fe-oxides, and then ultrasonic in 2% HNO3, which reduces grease and other contaminants.
Mounting options
There are several mounting options:
| Using one piece moulds, e.g. silicon rubber. | The individual grains can be stuck onto a glass coverslip. Use as little resin as possible, just enough to hold the grains in place. Small pieces of cured resin can be used to prop the grains into the required orientation if required. When the resin has cured, you can place the coverslip into the mould, and the mould topped up with resin. Once the resin has cured, the block is removed from the mould. The coverslip is then easily ground away to expose the grains. |
| Using aluminium ring moulds. | A length of brown parcel tape, sticky side up, is stretched over a 3X2 inch (75X51mm) glass slide and secured on the back. An aluminium ring is pressed onto the tape. The sample grains can then be positioned on the sticky surface of the tape within the ring. The (room temperature setting) resin is then poured into the ring and left to cure. Brown parcel tape is by far the best tape to use, for its stickiness, ease of removal after curing, and the ability to be stretched smoothly over a slide without wrinkling. Double-sided tape should be avoided as the adhesive used is generally quite thick, and the sample grains can be pressed too far into it, causing major problems later when removing the tape from the cured resin. |
| Using plastic ring moulds for small <100 micron grains. | Using double-sided sticky tape stick a piece of silicon rubber sheet 100x100mm to a similarly sized glass plate, untextured side up. Using as little epoxy as possible, stick each grain onto the rubber sheet. A single hair cut from a watercolour paintbrush and mounted in a hole at the end of a match stick can be used to apply the resin and manipulate the grains. When all the grains, and a standard if required, are in position, apply a thin film of resin to the bottom of a plastic ring mould and stick onto the rubber sheet around the sample grains. When the resin has set, top up the mould with fresh resin and leave to cure at room temperature. After 24 hours, the cured blocks can be removed by pulling and stretching the rubber sheet. The ease of removal depends on the type of double-sided tape used. If removal is difficult, then immerse in warm water for 30-60 minutes to degrade the tape adhesive. The silicon rubber, being stuck to the glass plate gives a very flat and fairly smooth surface which requires only a few seconds grinding on 2500 grit SiC paper to expose a cross-section through even <50 micron grains. After grinding polish briefly as usual. |
| Using a block of pre-cast resin. | A block of epoxy resin is made, and cut and ground to the required dimensions. Using a flat bottomed drill, several holes are drilled in the block. The sample grains are placed in the holes and topped up with resin. This method is best suited to a few large >1mm samples. For smaller grains 100-200 micron drill several 3-5 mm holes through the resin block. Apply brown parcel tape to one face of the block. Pour the sample grains into the holes using a cake icing nozzle or other small funnel. A depth of 1-3 mm is enough. Add a single drop of resin onto the samples by running the resin down the side of the hole. Try to avoid trapping any air under the grains. Too great a depth of sample will hinder resin infiltration and may trap air in the sample. A gentle vacuum may help but beware of escaping bubbles displacing the sample grains. After a few minutes, add more resin to the top of the holes. For best results cure under pressure ~2 Bar. Once the resin has cured remove the tape. The bottom of the resin-filled holes will be slightly concave. Any air holes can be topped up with fresh resin, and a little grinding may be required to better expose the holes. After 72 hours lightly grind and polish. |

Hot versus room temperature cure
All the epoxy resins in these tests (except Petropoxy) were cured at 20 C as all suppliers gave curing schedules for that temperature. Some suppliers gave curing schedules for higher temperatures. Experience of using some of these resins for the routine preparation of petrographic thin sections shows that epoxy resins will cure at higher temperatures-up to 80 C.
The advantages of higher temperature curing are:
- Reduced viscosity, allowing better impregnation of porous samples and a greater tendency for bubbles to dissipate.
- Shorter cure times ~ 30-60 minutes.
- Reduction or elimination of surface tackiness (Amine blush) which some resins can display.
Advantages and procedures of vacuum impregnation
The use of vacuum during encapsulation can improve impregnation of porous material and reduce the number of bubbles in the finished block.
After thoroughly mixing the resin and hardener, place in a vacuum chamber and evacuate to 20inHg - 250 Torr. The resin will bubble gently. Too high a vacuum will cause the resin to boil vigorously. After a few minutes, when bubbles have stopped appearing, gradually reduce the vacuum and remove the resin from the chamber. Without stirring, pour the resin over the sample in the mould. Return the mould to the vacuum chamber and evacuate to the same value as before. Any bubbles now seen should be coming only from the sample. The sample can be left under vacuum to cure, or air can be readmitted after 5-10 minutes to further force the resin into the sample. Most of the bubbles that remain are at the top of the resin block, and normally cut or ground away after removal from the mould.

Cure time versus hardness
Experience has shown that allowing the epoxy resin to cure over time results in a harder resin. This has been confirmed by an experiment using Buehler Epothin resin. The hardness increased from a ShoreD hardness of 53 to 75 over a period of 72Hrs. Allowing the epoxy to cure under pressure initially resulted in a harder resin but after 72Hrs the hardness was also 75. Amine Blushing is the tacky surface found on some epoxy mounts.
USA/European Equivalency Grit Guide - FEPA* and ANSI/CAMI** and mean grain size
| FEPA | Grain size | ANSI/CAMI | Grain size |
|---|---|---|---|
| P60 | 269 µm | 60 |
268 µm |
| P80 | 201 µm | 80 | 188 µm |
| P120 | 127 µm | 120 | 116 µm |
| P180 | 78 µm | 180 | 78 µm |
| P240 | 58.5 µm | 220 | 66 µm |
| P320 | 46.2 µm | - | - |
| P400 | 35 µm | 320 | 34.3 µm |
| P600 | 25.8 µm | - | - |
| P800 | 21.8 µm | 400 | 22.1 µm |
| P1000 | 18.3 µm | 500 | 18.2 µm |
| P1200 | 15.3 µm | 600 | 14.5 µm |
| P2500 | 8.4 µm | 1200 | 6.5 µm |
| P4000 | 5 µm | - | - |
(Table taken from Buehler Buyer's Guide 2005/2006)
*Federation of European Producers Association
**Coated Abrasives Manufacturers Institute
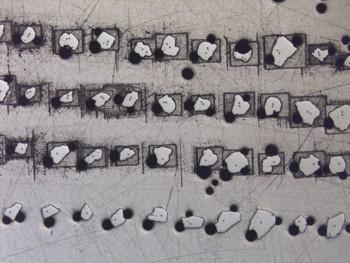
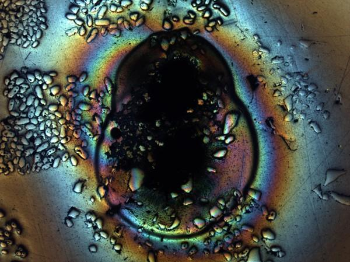
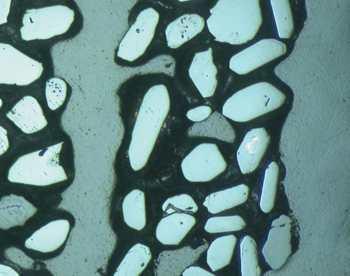
Examples of sample preparations
Every sample is different. These are just a few examples of preparation procedures. Please ask advice if you are in any doubt how to proceed.
Additional information
|
Struers have an excellent web site with application notes and techniques covering many aspects of sample preparation for various samples. |
Struers website |
| EPO-TEK have a great technical page, covering many of the questions you may have concerning epoxy resins. | EPO-TEK website |

